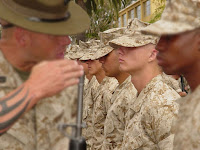
Often images are edited to make them look nice. This can be fixing a black and white photo or making a sunset out of a cloudy day. You will see many times that images are not in their original form but edited. Lab 10 felt like it had multiple labs in it. We had 5 pictures and our job was to use editing tools in Photoshop to make them look a certain way. In short; we changed some colors in a Family Guy poster, blurred objects in an image of soldiers, fixed a black and white photo, desaturated the background of a photo, and created a sunset. These tools were the magic eraser, blur tool, dodge tool, burn tool, paint bucket tool, sponge tool, and gradient tool. The paint bucket tool filled an area with color based on the color similarity of the pixels in that area. Blur tool is self explanatory, it blurs an area of an image. Dodge lightens areas of an image while burn darkens areas of an image (both do this based on midtones, shadows, or darkness). The sponge tool saturates/desaturated areas of an image. Gradient tool, also self explanatory, creates a gradient or blend between multiple colors. The magic eraser erases parts of an image based on a range of colors.
In Photoshop blending mode is used to determine how multiple colors will be blended into each other. For example, under normal blending mode there is a smooth transition from color to color while darker color displays a lower value of color based on the blend. The paint bucket could've been useful in my 5th lab using paint brushes. This tool would've let me color large areas more quickly. The blur tool would've been helpful in the 7th lab where I could've used it to blur the area around the turkey. I found the paint bucket best fit for me. It was very easy to use, all with a click I could change an area's color.
 |
| Before |
 |
| Before |
 |
| After |
 |
| After (Back Blurred) |
 |
| After (Front Blurred) |
 |
| Before |
 |
| After |
 |
| Before |
 |
| After |
 |
| After |
 |
| Before |


No comments:
Post a Comment